

Online Banking Guide
|
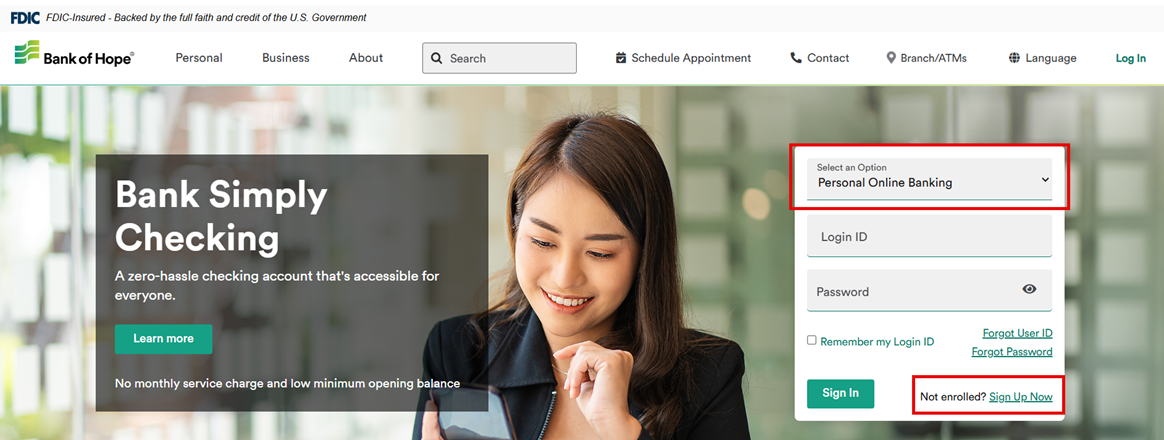
Step 1. Go to www.bankofhope.com. Select Personal Online Banking and click Sign Up Now. |
|
|
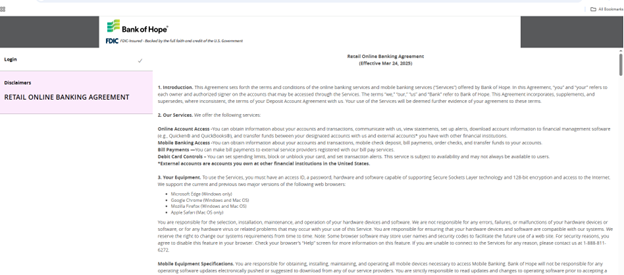
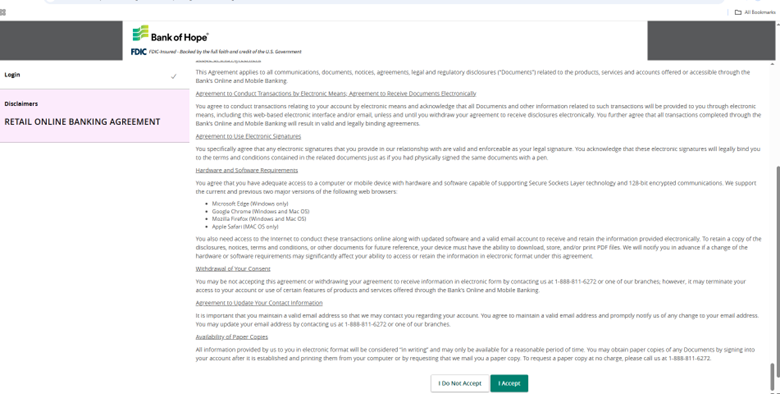
Step 2. Read through Retail Online Banking Agreement. Accept the terms of agreement by clicking 'I Accept'. |
|
|
Step 3. Fill out the Online Banking Registration form. Click Continue. IMPORTANT:
|
 |
|
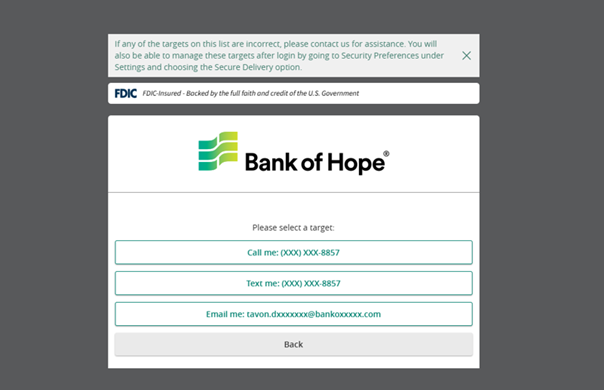
Step 4. Select method for receiving the Secure Access Code verification by choosing: Call Me Text Me Email Me |
 |
|
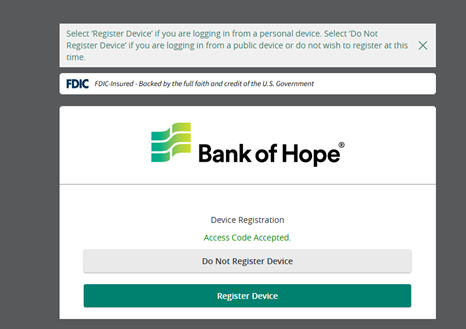
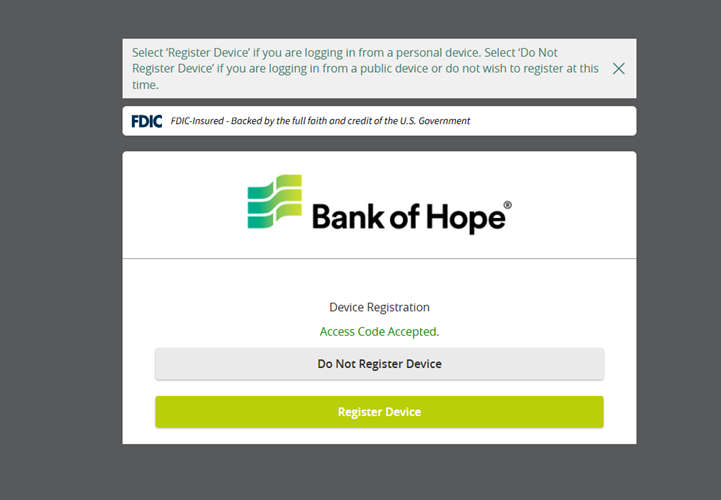
Step 5. Select if you would like to register your device.
|
 |
|
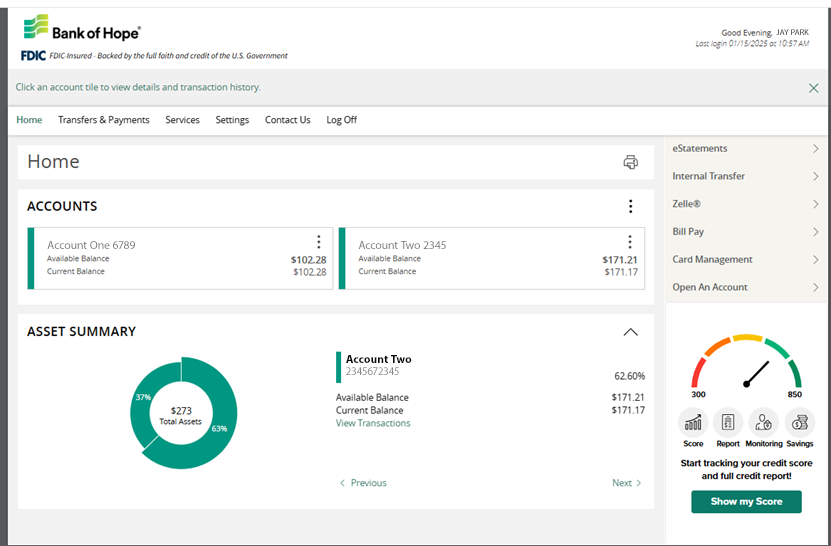
Step 6. Registration complete. Welcome to Bank of Hope Online Banking! |
 |
|
Once you log in, you will see a display of your account(s) on the Home screen. |
 |
|
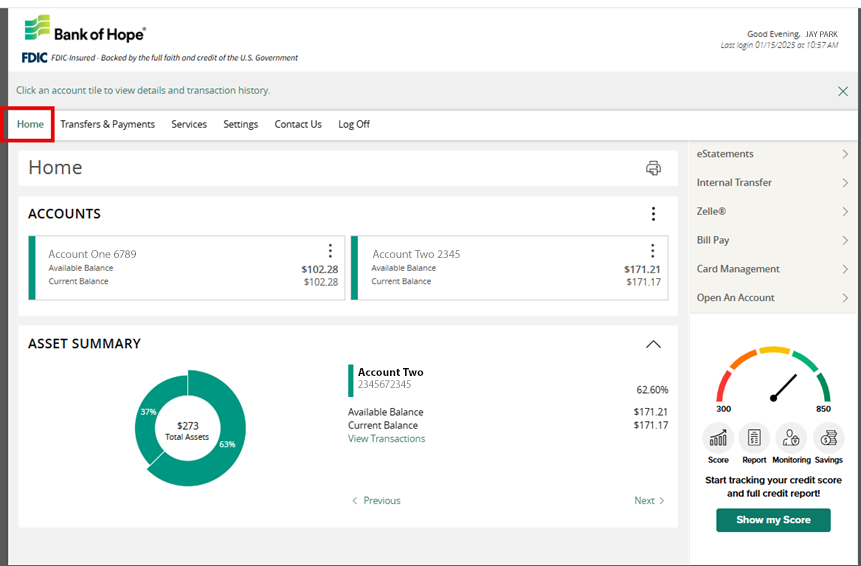
Step 1. Click Accounts in the menu on the right top. Click Account Activity. |
|
|
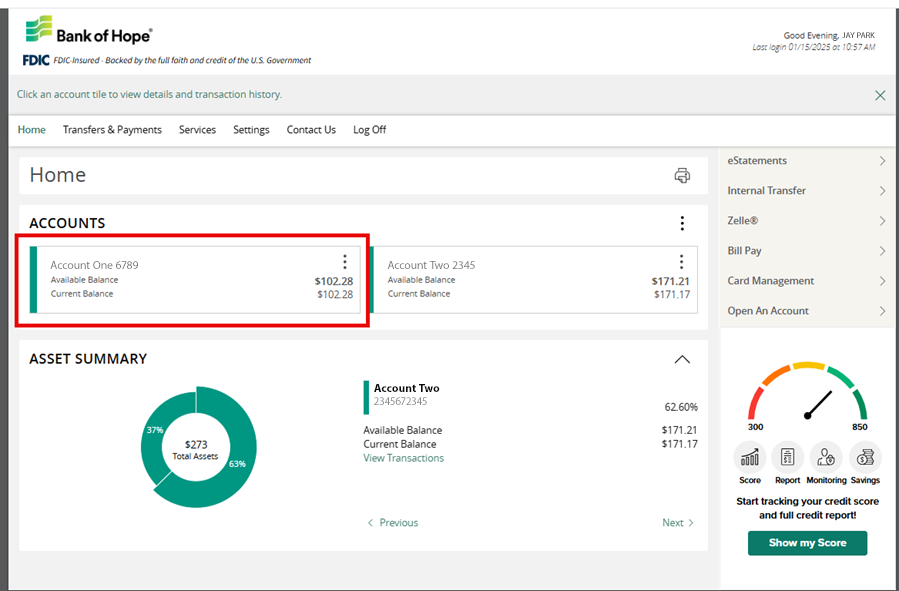
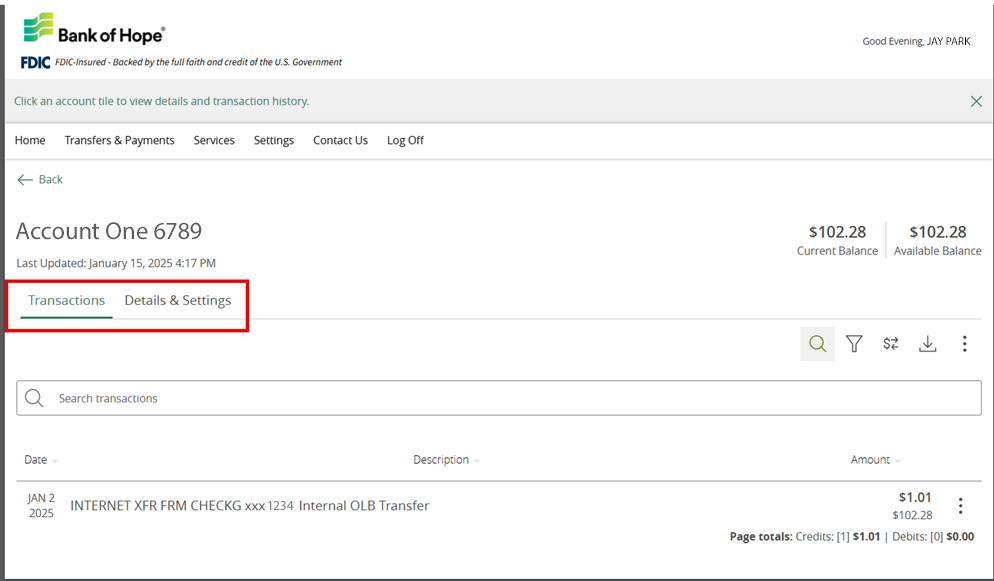
Step 2. Select the account title to view details and transactions history. |
 |
|
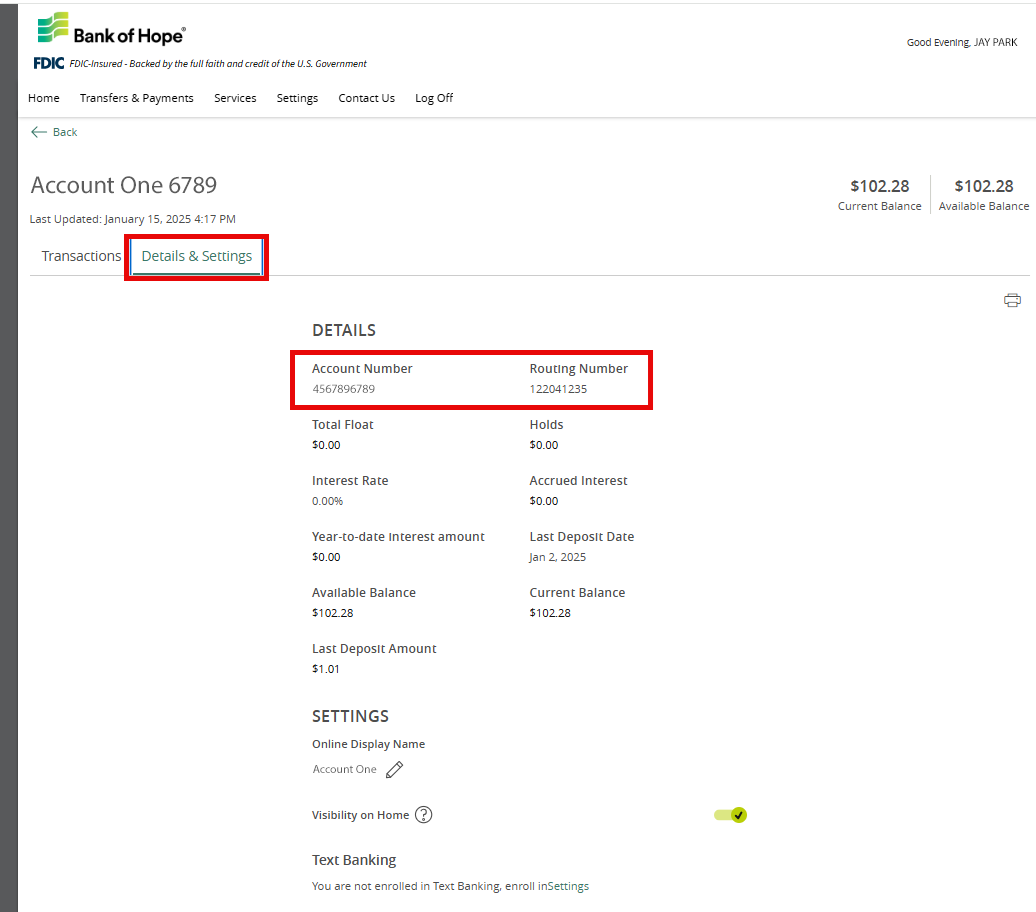
Step 3. Click on Transactions or Details & Settings for account information.
|
 |
|
Select the account, then on the Details & Settings screen, you can view your full account number and routing number and other account-related details. |
 |
|
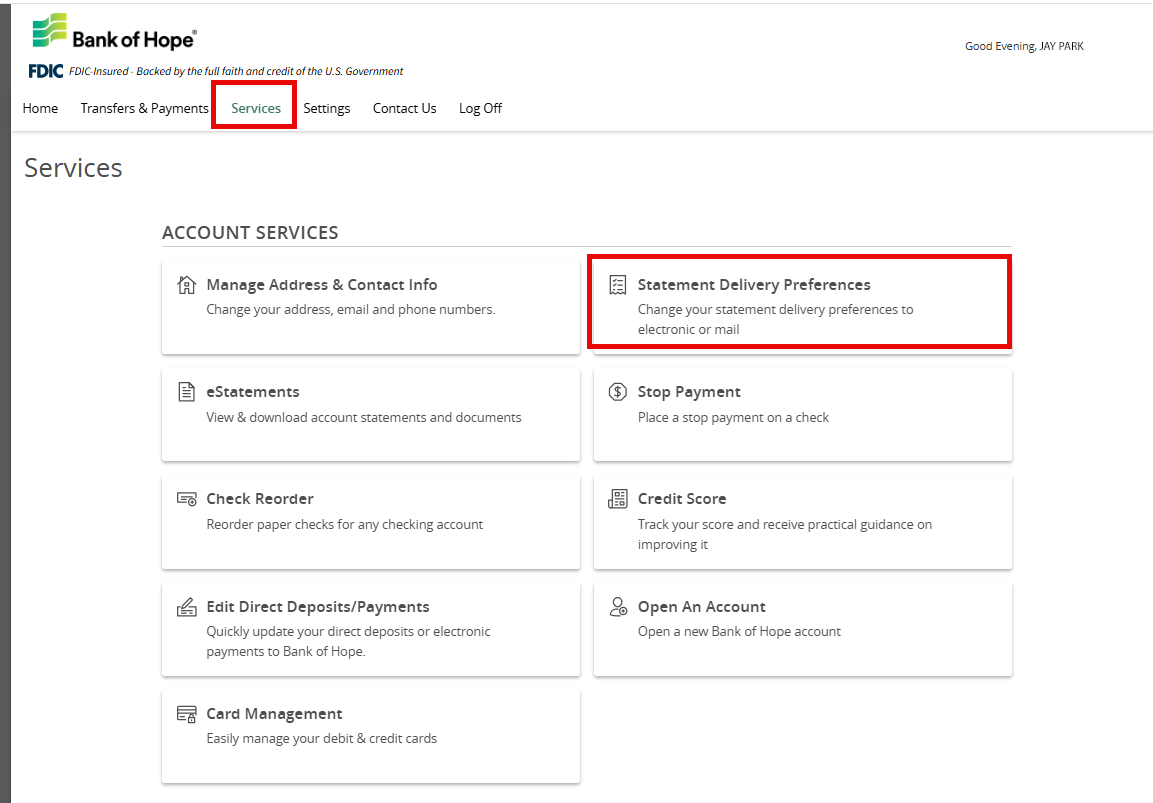
Step 1. Select Services option. Then, click on Statement Delivery Preferences. |
 |
|
Step 2. Select the Delivery Type Preferences between Electronic Statements or Paper Statements and accept the Statement Delivery Disclosure then click Submit. |
 |
|
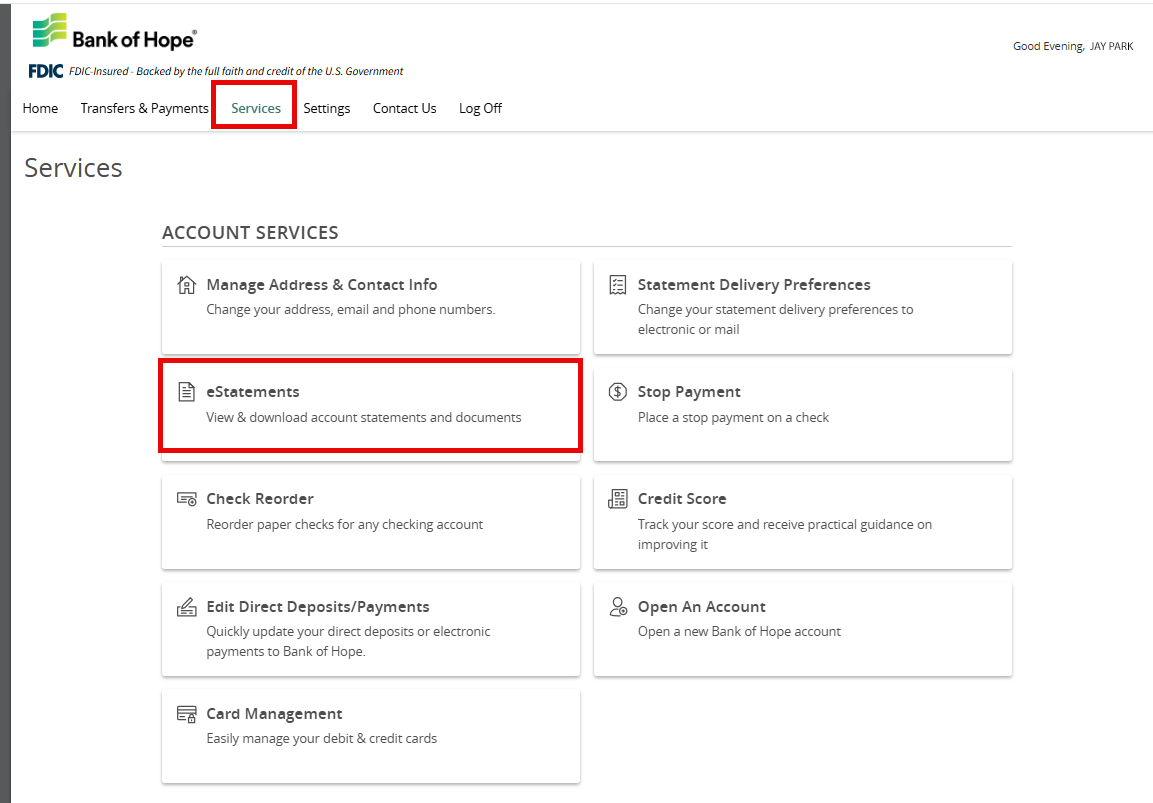
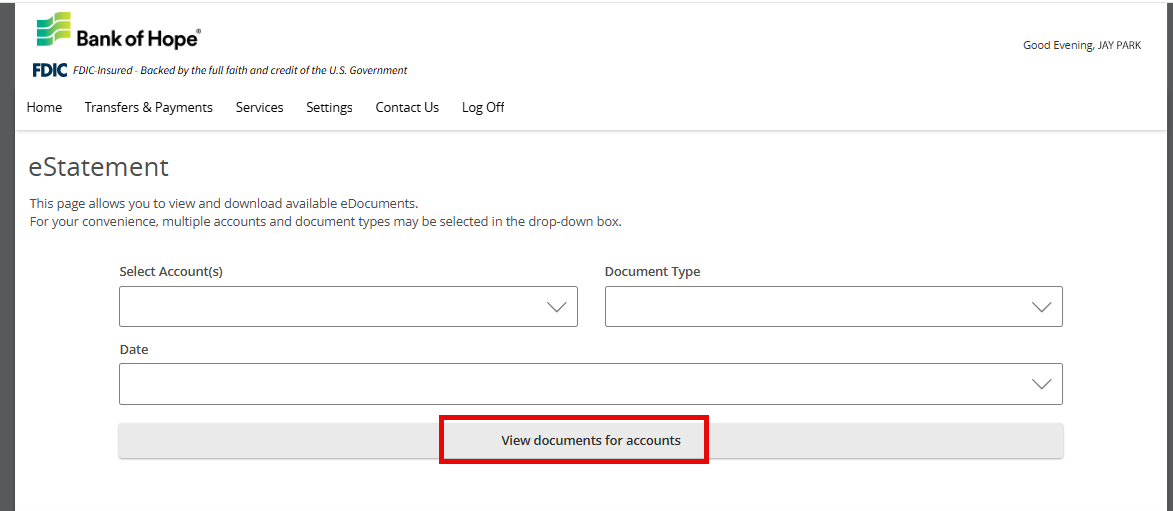
Step 3. Select Services option then click eStatements. |
 |
|
Step 4. On the e-Statements screen, select the following and click View documents for accounts.
|
 |
|
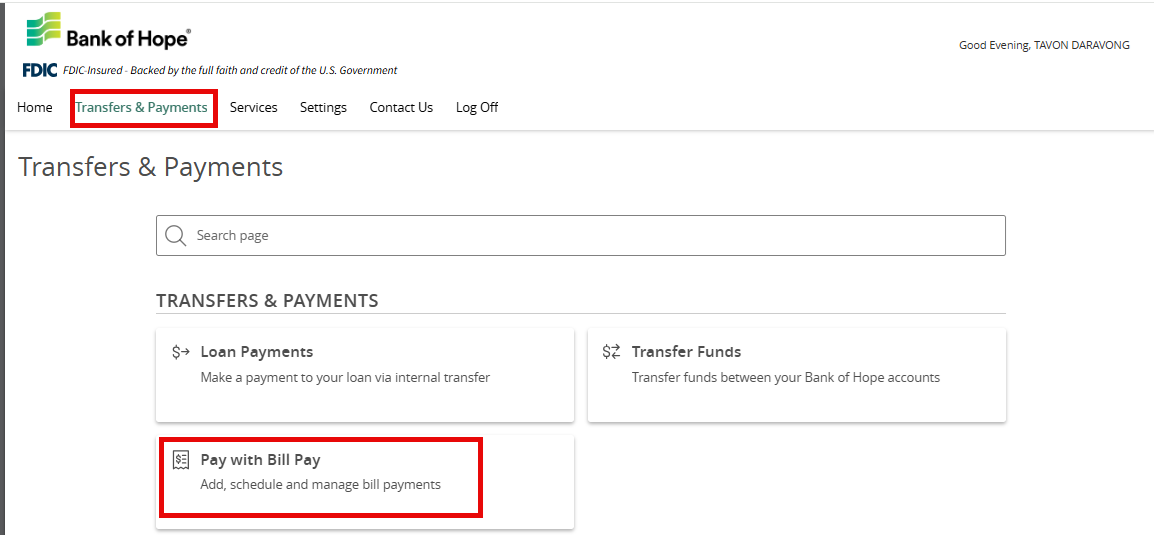
Step 1. Select Transfers & Payments then click on Pay with Bill Pay. |
 |
|
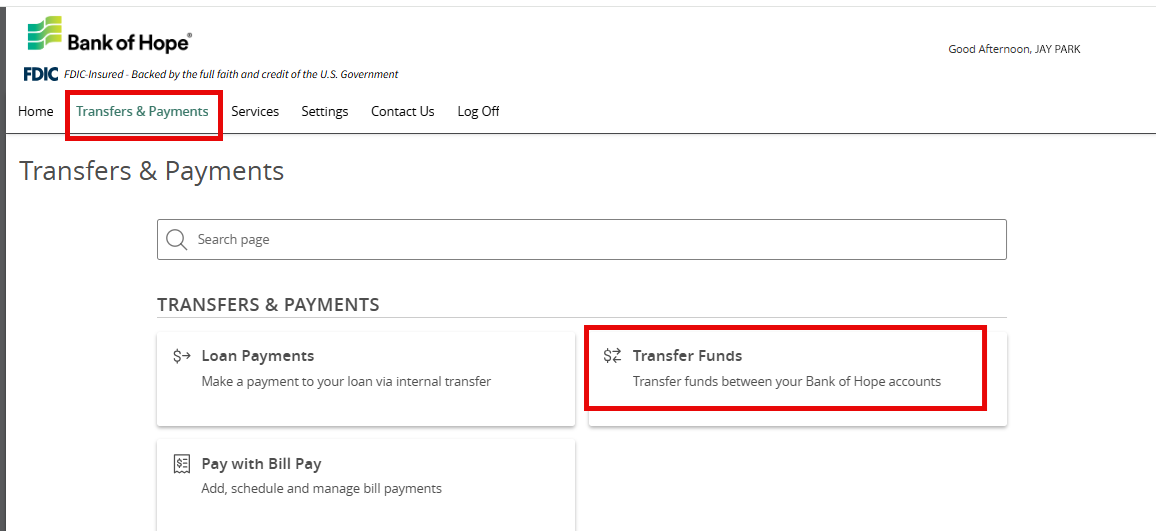
Step 1. Select Transfers & Payments then click on Transfer Funds. |
 |
|
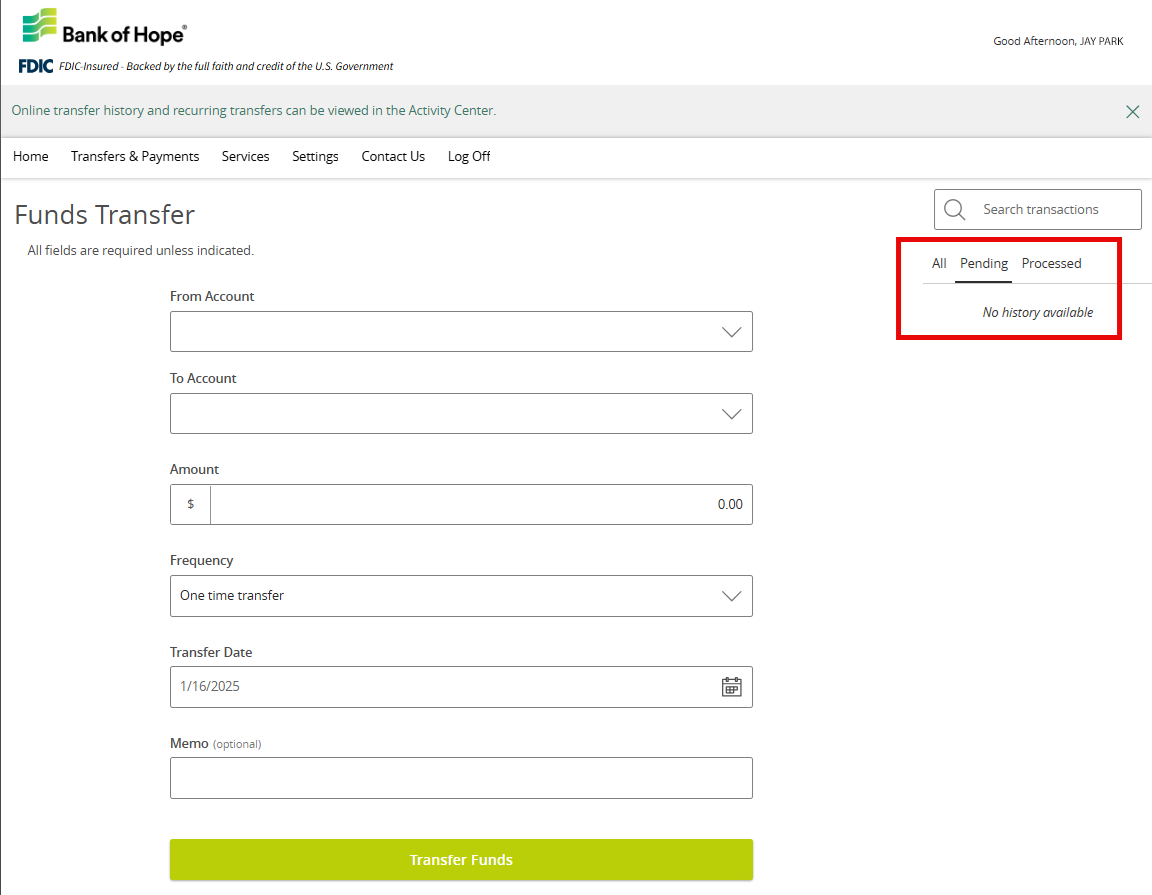
Step 2. Complete all fields and click Transfer Funds. |
|
|
Step 3. On the right side you can also Search Transactions, view “All, Pending, Processed” transactions. |
 |
|
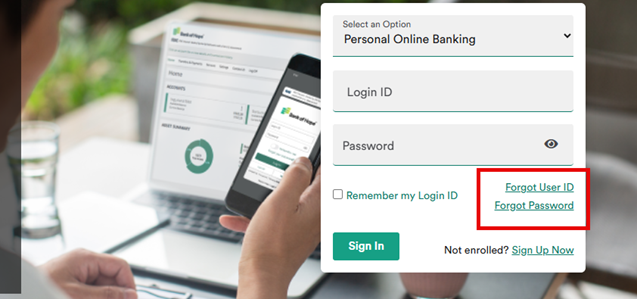
Step 1. If you forgot your password, you can reset your password. 1. Go to bankofhope.com. Click Forgot Password? under Personal Online Banking login section.
|
|
|
OR 2. If you failed your login, Forgot Password link appears. Click Forgot Password?. |
|
|
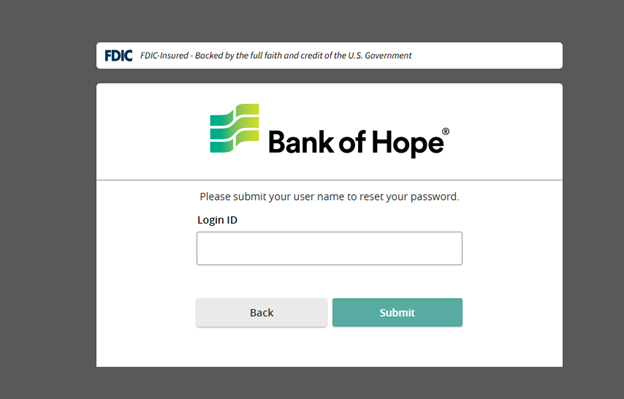
Step 2. Enter your Login ID and click Submit. |
 |
|
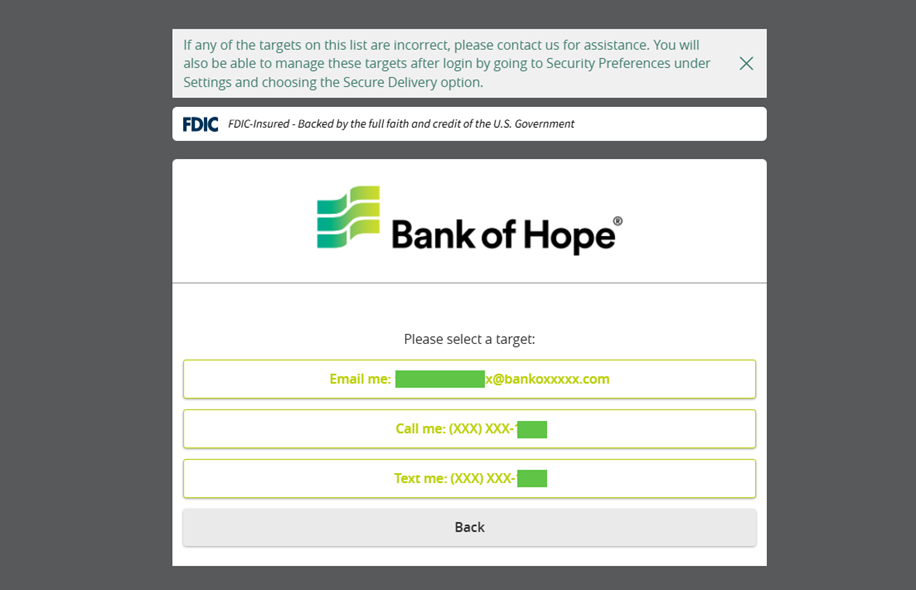
Step 3. Select method for receiving the Secure Access Code verification by choosing: Call Me Text Me Email Me |
|
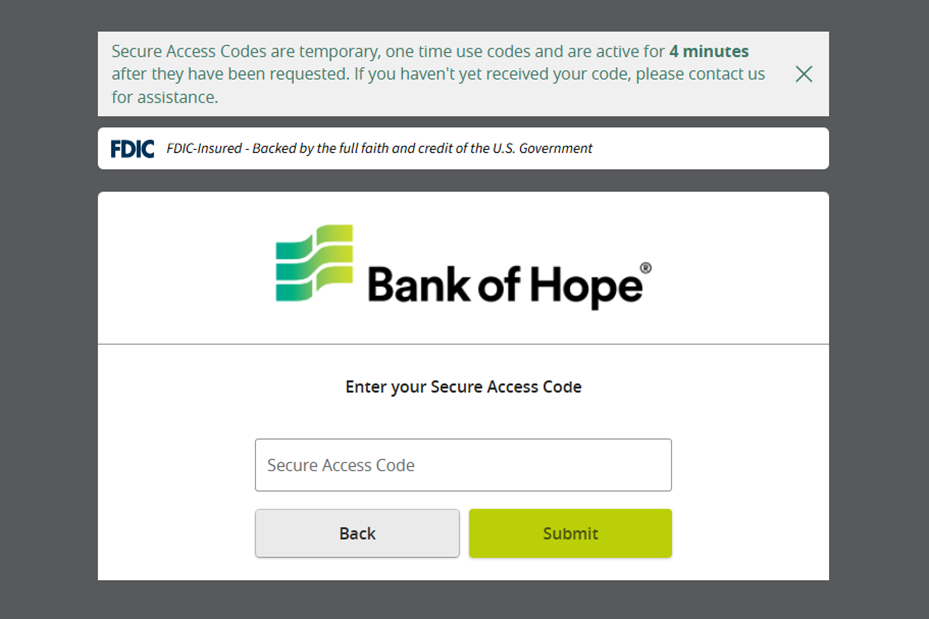
- Secure Access Code “SAC” are temporary, one time use codes and are active for 4 minutes after they have been requested.
- You will be prompted to select of the channel to receive the code. If you haven't yet received your code, please contact us for assistance.
- Keep your eyes out for the SAC to sent then enter the code to the Secure Access Code
- This is optional and always remember to use caution.
- Select Register Device if you are logging in from a trusted personal device.
- Select Do Not Register Device if you are logging in from a public device or do not wish to register at this time.
Mobile Banking Guide
|
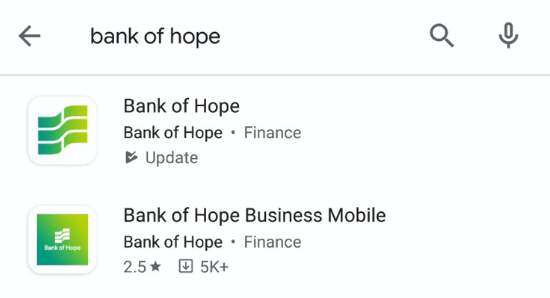
Step 1. Search “Bank of Hope” in the App Store (Apple iPhone) or Google Play Store
Step 2. Click the “Bank of Hope” app with a white background and green flag logo.
Step 3. Follow the instructions prompted by your device to download and install the app. |
 |
|
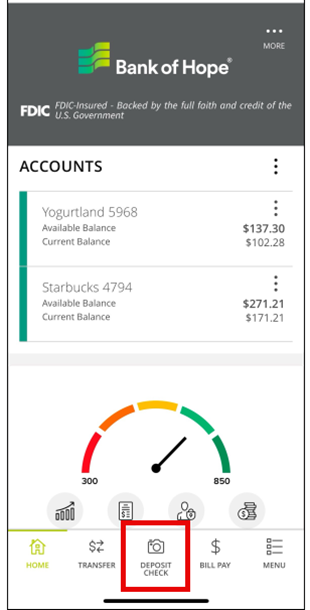
Step 1.
Within the mobile app, tap the 'Deposit Check' icon.
NOTE: Mobile deposits can only be done within the mobile app. (i.e. not from mobile browsers) |
 |
|
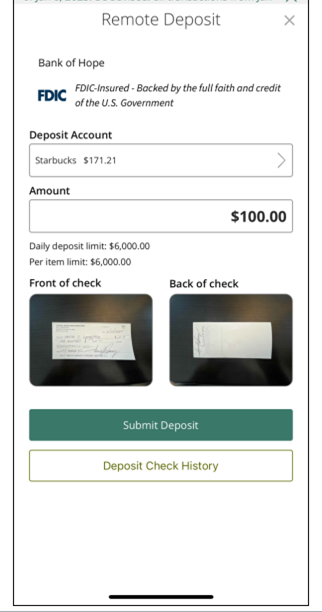
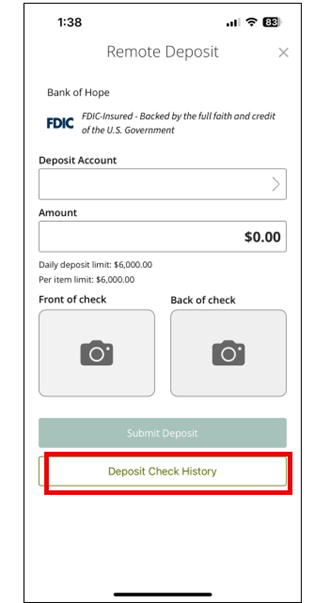
Step 2.
Select the 'Deposit Amount', enter amount, snap the front and back picture of the check to be deposited. |
 |
|
Step 3. Tap 'Submit Deposit'. |
|
|
Step 1. |
|
|
Step 2. |
 |
|
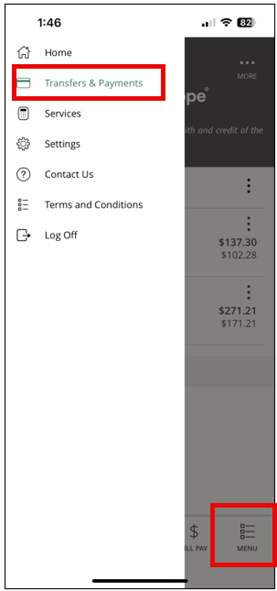
Alternative Step 1. Tap the 'Menu' icon on the the bottom right side of the mobile app and select 'Transfers & Payments'. |
 |
|
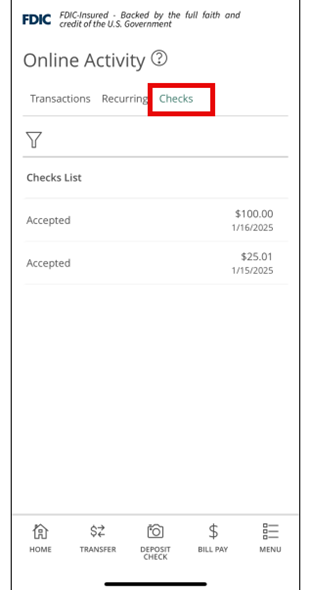
Alternative Step 2. |
 |
|
Alternative Step 3. |
 |
Need Help?
Digital Banking Help
Visit our learn more page for step by step instructional videos and guide
Contact us
Call Center / Mobile Banking:
1-855-325-2226
Hours
Mon-Fri: 5:30 am - 6:00 pm (PST)
Sat: 6:00 am - 1:00 pm (PST)
